Wednesday, March 9, 2011

Bagels


I love bagels, they are undoubtedly one of my favorite foods. So I knew once I started cooking all of my food from scratch, that I would have to master bagels. There are, in my estimation, some requirements for a bagel to be considered a proper bagel. First they have to be from yeast leavened bread, no quick breads! Second, the first step in the cooking process, they have to be boiled. Boiling is the only way to get the trademark chewy texture and glossy crust that should always be present in a bagel. Pictured is a cinnamon raisin bagel, however, you could omit the cinnamon and raisins and sprinkle sesame seeds on top or dehydrated onions or whatever you choose, really the options are limitless.
Ingredients:
1 1/2 cups warm water
2 tbsp active dry yeast
1 tsp sugar
2 cups bread flour
2 1/4 cup whole wheat bread flour
1 tbsp salt
3 tbsp sugar
2 tbsp plain yogurt
1 egg white
1 tbsp water

Sesame seeds for top if using or if you are making cinnamon raisin use 1 tbsp cinnamon and 1/2 cup raisins.

Directions:
In the work bowl of a stand mixer, mix the water 1 tsp sugar and yeast. Let sit for 5 to 10 minutes until foamed up. With the paddle attachment on low speed mix in both of the flours, salt, remaining sugar, and yogurt until the dough just begins to come together. Switch to the dough hook and knead at medium speed for 10 minutes until you have a nice flexible dough. Loosely cover and remove to a warm place for 2 hours or until dough has doubled in size. Punch down and knead a little bit more, if you are making cinnamon raisin bagels this is the time to add the cinnamon and raisins, knead in until the cinnamon is just swirled through. Put 2 quarts of water on to boil.
Divide dough into eight equal portions and let rest on the counter for five minutes. Make a hole in the middle of each dough ball and pull apart about 2 inches. Place on baking sheet, cover with damp towel and let sit for 10 minutes. Drop bagels two at a time into the boiling water for 45 sec each, turning once halfway through. Let drain on a cooling rack. Mix egg white and water and brush on to the bagels. Place bagels on a greased cookie sheet (or on parchment paper) and bake 35 minutes. Bagels will be golden brown and shiny.

Thursday, March 3, 2011

Yogurty Goodness


I have previously posted a recipe and method for making homemade yogurt. While the method is fantastic the recipe was somewhat less reliable. Sometimes I would have a great batch of yogurt and other times not so much. This recipe is great and every time I get a perfect batch of yogurt. If you have never tried making your own yogurt, give it a try. Use this recipe with the method I've posted previously. Once you do you will never go back to store bought yogurt again.

Recipe:
Adapted from Alton Browm
Ingredients

  • 1 quart 2-percent milk
  • 1 envelope unflavored gelatin
  • 1 to 2 tablepoons honey
  • 1/2 cup plain yogurt, room temperature

Directions

Pour milk into small saucepan and whisk in gelatin and honey. Place over medium heat and bring to 120 degrees F on a candy thermometer. Once milk has reached 120 degrees F, pour into a mason jar (you might have to pour a little into a smaller jar also), reserving 1/2 cup. Whisk in the reserved 1/2 cup into the yogurt and add back to the milk mixture.
Follow my previous directions for fermentation. method
After fermentation is complete place into the refrigerator overnight.

Tuesday, February 15, 2011

Graham Crackers

        My children's favorite snack is graham crackers but it is not the healthiest snack. The store bought varieties are loaded with sugar. However, graham crackers made at home are an entirely different story. These are made from wholesome whole grain graham flour and naturally sweetened with a bit of honey. These are truly delicious and easy to make. The only challenge I ran into was obtaining the graham flour. They do not sell it in the local mega mart or even Whole Foods. If you live in the Northwest, they have it in the natural foods section of Fred Meyers, otherwise you can order it here. Trust me, these are worth the effort, did I mention they are also a fraction of the cost of store bought crackers?

Graham Crackers
Ingredients
1 ¼ cup graham flour 
¼ cup all-purpose flour
3 tbl dark brown sugar
3/4 teaspoon baking powder
1/2 teaspoon baking soda
1/2 teaspoon kosher salt
1/8 teaspoon ground cinnamon 
6 tbl unsalted butter, cut into 1/4-inch cubes and chilled
4 ½ tbl honey
3 tbl whole milk
1/2 teaspoon vanilla extract
Directions
Place both flours, sugar, baking powder, baking soda, salt and cinnamon into the bowl of a food processor and pulse several times to combine. Add the butter and pulse until the mixture resembles cornmeal. Add the honey, milk and vanilla extract and process until the dough forms a ball, approximately 1 minute. Press the ball into a 1/2-inch thick disk, wrap in plastic wrap, and refrigerate for 30 minutes.
Preheat the oven to 350 degrees F.

Unwrap the chilled dough and place it onto a large piece of parchment paper and top with a second sheet of parchment paper. Roll the dough out until it is 1/8-inch thick. Slide the rolled dough and parchment paper onto a half sheet pan. Remove the top sheet of parchment paper and cut the dough, using a rolling pizza cutter into 2-inch square pieces, by making vertical and then horizontal cuts all the way across the dough. Trim off any excess. Using a fork, poke holes all over the top of the dough. Leave the crackers on the pan and bake on the middle rack of the oven for 25 minutes or until the edges just start to darken. Remove from the oven, set the sheet pan with the crackers on a cooling rack and allow to cool completely. Once completely cool, break into individual crackers and store in an airtight container for up to 2 weeks.

Saturday, February 12, 2011

Play Dough Valentines

It is the weekend before Valentines Day and that means that it is time to prepare those classroom valentines for your kids. The store bought ones are a little lack luster and they charge way too much for them. There is no way that 20 slips of paper with 20 flimsy envelopes should cost $3 a piece, it ridiculous. These home made valentines are the perfect solution, they are original and because you make the play dough yourself they come in at a fraction of the cost. The play dough is exceptionally easy to make and I sealed them in Ziploc and added valentines that I printed on card stock to finish them off. I made the double heart imprint with a cookie cutter. Try making your own valentines this year and you will not only be saving money but it offers a chance to spend some quality time with your kids making something really special.

Play Dough Recipe:


2 c. flour
1 c. salt
1 tbl cream of tarter
2 tbl vegetable oil
2 c. warm water
food coloring

In medium sauce pan mix all the ingredients except coloring together. Cook over low heat until the dough pulls away from the sides of the pan. Turn out onto a clean counter top and allow to cool. Knead vigorously until silky smooth. Make a divot in center of the dough and add food coloring, knead through.


Wednesday, February 2, 2011

Raspberry Muffins


Once I week I always try to bake up some muffins or a quick bread. They are perfect for an after school snack or for those rushed Sunday mornings.  These muffins were made with whole wheat pastry flour so I could sneak some wholesome goodness into them but you could really use whatever kind of flour you have on hand. I soaked my grains but that is totally optional. For more on the health benefits to soaking your grains look 
here. 

Raspberry Muffins
1 1/2 cups whole wheat pastry flour
1/2 tsp baking soda
1/2 tsp baking powder
1/4 tsp salt
1 1/2 tsp cinnamon
3/4 cup sugar
2 eggs
2/3 cup oil
1 1/2 cup frozen raspberries

Preheat oven to 400 degrees. Grease a muffin pan or use paper cups. In a small mixing bowl mix flour, baking soda, baking powder, salt, and cinnamon. In the work bowl of a stand mixer beat eggs sugar and oil until fully mixed (this can also be done in a large mixing bowl with a hand mixer). Mix in the dry ingredients until just moistened. Fold in raspberries. Portion the batter into the muffin cups, they will be almost full. Bake 20 to 25 min.

Tuesday, February 1, 2011

Shepherd's Pie


Are you looking for a tasty, home made meal, that is loaded with nutrition while being super thrifty? Then Shepherd's pie is for you. I started making Shepherds Pie a couple of years back for St. Patricks Day. While I have Irish heritage I HATE corned beef, so I did some research on Irish cooking that did not incorporate the nasty stuff. The recipe I traditionally make for St. Patrick's day I will post next month. This recipe, however, I found recently and I just love it. It is loaded with veggies, and is super simple with the help of a gigantic bag of frozen veggies. I am aware that there is a bit of a stigma to frozen veggies but don't let that stop you from using them. Frozen veggies are picked at the peak of freshness and then flash frozen so, unless you are using veggies straight from your garden, they really are among  the highest quality veggies you can get, especially this time of year. This recipe also incorporates carrots in the mashed potato topping, which at first I though was strange but was delightfully surprised at how yummy it is. Give this recipe a try, it is really great.

Shepherd's Pie
adapted from Passionate Homemaking


Ingredients:

8 medium potatoes, cut into chunks
8 medium carrots, cut into 
small chunks
1 lb ground beef
1 medium onion, chopped
3 garlic cloves, minced
20 oz can stewed tomatoes
2 1/2 tsp. sweet basil leaves
1-2 Tbsp honey or sugar if you prefer
1 tsp. salt
1 tsp paprika
1/2 tsp ground mustard
1 tsp garlic powder or more fresh garlic
1 bay leaf or 1 tsp chopped bay leaf
1 cup fresh mushrooms, sliced (optional)
1 32oz bag of frozen mixed veggies thawed
1 cup milk & half stick of butter for the potatoes 
1/2 – 1 1/2 cups grated cheddar cheese
Directions:
Peel and chop up carrots, peel and quarter potatoes. Add the carrots to a pot of boiling water, wait ten minutes then add the potatoes (the carrots need a little extra time). Cook until tender approx. 15 to 20 min. While those are cooking, in a large skillet brown the ground beef, add the onion and the garlic when the beef is about half way browned. Add the rest of the ingredients except the veggies and mushrooms. Allow to simmer for about 10 min. Add mushrooms and the entire bag of frozen veggies and simmer for another 15 min. When the carrots and potatoes are tender drain, add the butter and milk and beat with a hand mixer until light and fluffy,  add a little salt and pepper to flavor. Layer the meat mixture in a 9x13 pan then spread the potato/carrot mixture on top. Top with cheese and a dash of paprika if desired. Bake for 30 minutes at 350 degrees.

Sunday, January 30, 2011

The Facebook Fast

      
       Lately I have been thinking quite a bit about friendship. There are several different types of friends. Work friends whom you just see in and around the workplace. Satellite friends whom you see and interact with at common social functions like church or friends houses with whom you are friendly but may not know very well. Then there is the rarest and most important type of friend, a friend of the heart. This is someone you can tell anything to, someone who you might not need to tell everything to, who just knows by looking at your face. This is the friend who you might see after an absence of several years and it is like no time has past. These friends are few and far between. I can honestly say that I have only had a couple of this type of friend in my whole life. I meet them in junior high and we are still friends. However they are off living their lives and me mine so we do not see or talk very much any more but I still count them amongst my dearest friends.
           Recently a new type of friend is common, the "Facebook Friend" this might be old friends from high school or new friends from church but this is a friend that you primarily communicate with electronically. You text, post on each others walls, and comment on their latest trip to blah blah blah. This is all nice and well and good but I can't help but feel that it is a tad superficial. Where is the discussion, the depth? Its like you are being fed the friendship equivalent of twinkies when what you are really craving and need to be sustained are friendship meat and potatoes. Texting, emails, facebook, myspace, these are all modern conveniences but are they really good for us? They offer us a pleasant diversion and feeling of relationship but it is all on a surface level. They have redefined how we communicate and interact with one another but at what cost. Several friends of mine will text and facbook each other but will never return a call. I'm am weary of this pseudo-friendship, I crave and need something more.
          So I purpose this, a Facebook fast, when I say Facebook I mean all electronic socializing. Texting has a place if you want to as a quick question, but an entire conversation? No. I'm done. I am removing myself from it all. No Facebook, no texting for one month. I am a realist and I know that these inventions are handy so I am not quitting all together but I am taking a Facebook Fast for one month.

The Rules:

  1. No Facebook for personal purposes. I love this blog and Facebook is the only means by which to communicate that I have something new up. So I will continue to post on my Diapering Gourmet page but after this evening nothing on my personal page.
  2. No Texting, if you quickly want to let  me know to pick something up from the store or that you need something that is fine, but I will not carry-on an entire conversation. I love all my friends and if you would like to talk, I'd love for you to call me.
  3. As some information is much easier obtained via email, I will continue to email.
I am boldly going where we all used to be communication-wise for one month. If you are brave and bold of heart I urge you to join me.

Tuesday, January 25, 2011

Yogurt From Scratch


My kids love yogurt, but the problem is that the store bought varieties are loaded with sugar and preservatives while also being rather spendy. Lets us also not forget that yogurt is very good for you. It contains live active cultures which aid in digestion, also yogurt can help with constipation and indigestion. Also I need to make everything from scratch and that includes yogurt. A month ago I would never have dreamed of making yogurt myself, but it is actually quite simple and really inexpensive.

Supplies:

  • quart size glass jar
  • candy thermometer
  • 1 quart fresh milk (I read to use non-homogenized, but really who can find that. I used regular milk and it was fine)
  • 2 tsp gelatin
  • 2 tbs yogurt starter from previous batch or plain yogurt (make sure it has live active cultures)
  • large pot
  • heating pad
  • 2 bath towels
Instructions:
  1. Make sure you have clean equipment
  2. In a sauce pan, heat milk between 120 and 180 degrees.
  3. Remove from heat and allow to cool to 110 degrees then add the gelatin and yogurt starter.
  4. Empty jar of hot water then pour your milk mixture inside of it.
  5. Place your jar into the large pot and fill half way up the side of the jar with 110 degree water. Then place on top of the heating pad and wrap the whole thing up in bath towel to maintain the 110 degree temp. Allow to incubate for 10-12 hours or overnight. 
  6. Remove to the refrigerator and allow to cool for three more hours before diving in and enjoying. The yogurt will continue to firm up the more  it cools. 
  7. Make sure to set aside two tbl of your yogurt for your next batch. Use within a week for the best results

Saturday, January 22, 2011

Hand Made Tortillas


Day one of our "making everything from scratch" plan we had burritos on the menu which means home made tortillas and refried beans. The refried beans were really easy and you can find the recipe here Refried Beans Recipe. The recipe for the tortillas is simple but rolling them out can be a bit challenging unless you follow my simple steps below. I soaked my grains but this step is not vital and completely optional, for more about the health benefits of soaking read here.  These hand made tortillas may not look as perfect as the store bought ones but they are tender and very tasty!

Whole Grain Tortillas


3 cups whole wheat flour
1 cup water
1 Tbl lemon juice
1/4 cup melted butter
1/4 tsp baking powder
1 tsp salt

Combine ingredients then turn out onto a work surface and knead until workable but not too stiff. Shape into 8 to 10 balls and let sit for 10 minutes.

Take a piece of parchment paper and measure out a ten inch square. This is used to eyeball the size of your tortilla. They do not need to be perfect but this helps. Then sandwich your dough ball between the parchment with the square and another piece and roll out.
Then peel the top piece of parchment paper away and flip onto a skillet or griddle that is slightly greased and has been pre-heated over medium heat. Then peel away the remaining piece of parchment paper and cook the tortilla for 20 to 30 seconds per side until it is done but not yet browned.
Then when you are ready to assemble your burritos all you have to do is warm up the tortillas on the griddle and fill with your favorite fillings and enjoy!


Wednesday, January 19, 2011

When Life Throws Lemons At You


           Recently a change in circumstance has resulted in my family having difficult financial times. I've found myself beginning to despair. I looked at all the things that have happened in the past year to my family and me that landed me in this situation. Without seeming a tad melodramatic the words "why God why!" actually did enter my mind. But isn't that the thought that plagues non-believers and believers alike? Why do bad things happen to good people? I am not theologian enough to answer that question, I doubt that anyone is but I do know this, God is sovereign. 1 Timothy 6: 15 says' "... He will bring about the proper time -- He who is blessed and only Sovereign." He is in charge of all things, and all things happen in His divine timing and plan. Genesis 39: 3 "Now his master saw that the Lord was with him and how the Lord caused all that he did to prosper in his hand." It was a couple of days ago that this occurred to me, God is not doing this to me but perhaps is changing our circumstances to teach me something, so the real questions is, "What am I going to do with it?"
        We have $305 a month to feed a family of six. Let's face it that is a meager sum. It divides out to $76.25 per week. I do love a good challenge so I got to work. First in making any kind of change you have to evaluate what is important to you. For me it was feeding my family primarily on a tight budget while maintaining an all natural healthy diet. So how do I accomplish that? After quite a bit of research I found the answer, make EVERYTHING from scratch. This may seem somewhat extreme but let's face it, so is my goal. I've discovered with a little organization and effort it is quite possible to feed your family frugally and naturally. I've also discovered some interesting easy steps towards higher nutrition that can be taken along the way.
     I know that not all of us have to live on a meager food stamp budget but all of us can benefit from lowering our monthly food budget while feeding our family more natural healthy food. Follow along with me these next few weeks as I attempt to achieve this goal and enjoy all the great recipes to come. So when life throws lemons at you, I say take the lemons and make them into something wonderful.


Sunday, January 16, 2011

Must Sleeeeep


        It seems that many of my friends are saying the same thing, that they are not getting enough sleep. I too am not getting nearly as much sleep as I feel that I need. For one friend of mine her 7 mo. daughter who was sleeping through the night has suddenly and inexplicably gone on revolt. Another friend's three year old daughter, who once again always slept well has also dug her heels in and gone on a sleeping strike. For me, all four of my children for the last two days have been up before the sun rearing and ready to go. What is this anomaly? Have the sun moon and stars suddenly lined up under the sign blah blah blah and decided that all the children must be awake? What is this, and most importantly how do I get my much coveted sleep to return?
     Let me just state the obvious, sleep is important to everybody. When we sleep we rest and gain energy for a new day. When we don't get enough sleep we wake up cranky and irritable. When we dream we process all the events of daily life. Deep sleep is also the time when our brain lays down all of our long term memories. This is why it is so important for us and our children to get the proper amount of sleep, it affects the mood of the entire family.
      There are several reasons for your little one to be missing out on her Z's. She could be teething, sick, overstimulated, or ready to make a developmental leap. If your baby is teething there are several tried remedies that seem to work. Teething rings that can be chilled provide relief as well as a topical such as baby Oragel, health food syores also sell teething tablets that have also been known to provide some relief. Overstimulation is a big problem in our flash bang culture. So many times we will sit our kids in front of an exciting movie or cartoon and when it finishes we say all right now go to sleep. Meanwhile your child is completely excited from the film or whatever else excites him. Bedtime should start a good hour before they are tucked into bed. It should begin with a nice warm bath followed by a story which is proven to quiet the mind much more then a video. Then lie down with your little one and, if they are old enough, talk about what happened that day. Pray with them and give them lots of cuddles and love then kiss them goodnight. If you have a child who repeatedly gets up then continue to place the child back into bed without any more cuddles or kisses until they fall asleep. This is important because if you kiss them every time they will think woohoo I get up and I get more kisses and attention from Mommy. Also don't yell or get excited because that is still attention and sometimes bad attention is better then no attention at all.
      For those of us who have a baby over five months old who is still waking up several times during the night, there is no need for nightly meals no matter how much you baby night convince you otherwise. You need to teach your baby that nothing exciting happens during the night. Keep the lights down, and do not talk or play with your child. If she needs changing then do so with as little fuss as possible. Then put your baby back to bed. She might cry at first but let her cry, it will not hurt her. Maybe every 10 to 15 minutes go in there and rub her belly then leave. Eventually she will fall back to sleep. Teach your baby that they do not need to eat or drink at night. This may sound a little harsh but now is the time to establish good habits.
     Older children should know to stay in their beds. This, however, has been a battle in our family since we first became parents. So what I like to do is establish a rewards system. I buy things like cereal bars, dried fruit and other healthy snacks that they like and maybe don't get too frequently and then I tell them that if they stay in bed that they will get a treat for their morning snack. What do you do to get your kids to stay in bed? Comment and let me know.

Tuesday, January 11, 2011

Home Made Baby Food


     The time to start proper nutrition for your children is from the start. So why is it that at a time when diet is so crucial should most of our child's food come from jars and boxes. There is no great mystery to making your own baby food. It's easy. Nothing could be better for your baby then home cooked fruit and vegetable purees. It is a common misconception to the new parent to think that there is something special about the store bought baby foods that somehow makes it more appropriate for your baby. I made this mistake myself. I remember with my first child buying banana baby food, thinking somehow it is better then just squishing up a banana myself, it is not. Don't be mislead by the labels on the store bought baby food with long lists of nutritional benefits, yours will be just as nutritious only without added starches (such as maltodextrin which is the stuff they use for the glue on envelopes and stamps)! 
     Not only is home made food better for babies, it is MUCH cheaper. Even moms who don't have the time to cook and puree can give their babies a good start with foods like mashed banana, avocado, and papaya, which make excellent no-cook baby purees.
     You can plan all your babies foods ahead. Just pick a day and spend a couple of hours cooking and you will have your baby's food for an entire month. There are many deceptive gadgets out there for the mom who wants to make their own baby food. I have even seen a device that cooks and purees all is one that went for several hundred dollars. I have seen baby food making kits that sell for $40 or more. You do not need any of this. All you need is a few items that you already have in your kitchen, such as pots and pans to cook in and ice cube trays to freeze in, and that's it.
     Before I go into how to cook and freeze your puree, a note on picking out your produce. You should pick the best produce possible. Farmers markets, and farm stands are an excellent source also if you have an organic farm box delivery service near you many of them offer a baby food package which has a mix of produce that makes great baby food. If it is the dead of winter and none of these are an option for you then whatever you can find at the market is still better then the canned food. If organic eating is not your lifestyle, please remember the organic dirty dozen. These are the produce that tend to retain the most pesticide residues: peaches, apples, sweet bell peppers, celery, nectarines, strawberries (not for children under one year), cherries, pears, grapes, spinach, lettuce and potatoes.
    It would take forever for me to give you all of the cooking techniques for all of the different fruits and vegetable so I will just give you the resource that I use when I am cooking my own. It is an excellent site that gives instructions for every fruit and vegetable imaginable www.wholesomebabyfood.com
    For cooking and storing my baby food, this is the technique I use. I used butternut squash for this example.
Step One: Cook fruits or vegetable according to the instructions on the wholesome baby food site.
Step Two: Puree in a food processor, blender, or food mill.
Step Three: Fill ice cube tray with puree.
Step Four: Cover tray and freeze for a couple of hours until frozen solid.
Step Five: Break out of the trays into storage bags and store in the freezer. 
Each cube is one ounce. To serve remove the desired amount of food and put in a bowl. Then either let is defrost in the fridge or microwave on 50% power for 15 second per cube.

When your baby is ready for more complicated flavors I highly recommend this book The Healthy Baby Meal Planner  

Saturday, January 8, 2011

Mint Melon Slush


Now that you all have read my post on the proper way to dismantle a melon, let me give you something fun to do with it. This recipe is light, sweet and refreshing.

Mint Melon Slush
Ingredients

  • 1/4 (about 1 pound) honeydew melon, peeled and seeded, cut into 1-inch pieces (to yield about 2 cups.
  • 3 cups crushed ice
  • 1/2 packed cup fresh mint leaves
  • 1 1/2 cups ginger ale
  • 1/2 cup sugar 
Directions:
Add the melon, ice, mint, ginger ale, and sugar to a blender. Pulse until the mixture becomes slushy. Pour into 4 glasses and serve immediately.


How to Cut a Melon


This may seem like a simple task but melons are spherical, they are wobbly with thick rinds and when confronting such a task it is very easy to end up with cut fingers. I know that there are a millions ways to do this, however, this method preserves fingers and is much quicker then any other method I've tried.

  1. Cut both ends off the melon to make a nice even seat so that your melon does not wobble.
      2. Angle your knife and cut away the rind.
      3. Cut in half length-wise and scoop out the seeds with a spoon.
      4. The slice into wedges or cubes and enjoy!


Saturday, January 1, 2011

Homemade Dishwasher Detergent


Next in my series on homemade cleaners is dishwasher detergent. This is absolutly the easiest cleaner to prepare, and if you have made any of my previous cleaners then you already have the ingredients. This stuff works really great, and costs only pennies. I definitly recommend putting vinegar in the rinse department of your machine, otherwise you might end up with a powdery residue on your dishes.

Dishwasher Detergent:


1 cup Washing Soda
1 cup Borax

  • Mix thoroughly and store in a plastic container (I save my peanut butter containers from Winco), use approximately 2 TBS per load.
  • Use vinegar in the rinse compartment as a rinse agent to help prevent residue
  • Try adding 2-3 drops essential oil (I prefer lemon)


If you’re having a cloudy dishes problem after using the homemade detergents:
  • Try adding a few drops of liquid dishsoap to the powder compartment when you add the powder.
  • You could also try cutting back on the amount of soap used (if you’re using 2 TBS, try cutting it back to 1 – 1 1/2 TBS).
  • Make sure to use vinegar in the rinse cycle

Thursday, December 30, 2010

Party Popcorn


Remember when I started this blog, I promised in my mission statement that I would write about "motherhood well-being". So I far it has been nothing but cooking cleaning and saving money, where is the "well-being" you might ponder, well here it is. What could enhance our well-being better then a "girls night". My husband is working late tonight so I am having my friend over for a girls movie night. My daughter is also having a friend over tomorrow night, so what better time to whip up a double batch of Party Popcorn. This recipe is sweet, slightly salty, and totally addicting.

Party Popcorn
adapted from a recipe by Sunny Anderson
Ingredients:

  • 1/3 cup popcorn kernels
  • 2 tablespoons vegetable oil
  • 2 tablespoons butter
  • 1/2 cup butterscotch chips
  • 1/2 cup salted peanuts
  • 1 cup semi-sweet chocolate chips
Directions:

In a heavy pot on high heat, add oil and one kernel of popcorn. Cover. When kernel pops, add the rest. Pop until your no longer hear popping sounds. Remove from heat and spread on a baking sheet that has been lined with parchment or wax paper.  Melt the butterscotch chips and butter in a double boiler (or in the microwave in a microwave safe bowl). Stir the peanuts into the melted butterscotch and butter. Pour over popcorn and lightly toss with your hands. Melt the chocolate chips in the same manner you melted the butterscotch then drizzle all over the popcorn. Place in the fridge for a few minutes, just long enough for the chocolate to harden. Break up and serve.


Wednesday, December 29, 2010

How to Make Your Own Ajax or Comet


Sorry that I have not blogged for a while but the Diapering Gourmet had house guests. I was going to post several blogs on making your own household cleaners in the theme of prepping your house for the holidays and having guests but alas the busyness of the season prevented such aspirations. So here I am, house free of guests and the kids going back to school, so what else would I want to do but CLEAN and get my house back to "normal".  I hate spending money on a thousand different cleaners, also I really hate having all those assorted chemicals in my house. So I started researching how to make a myriad of different household cleaners. Today I will be introducing you to making your own Ajax or Comet. The ingredients for this are simple and this cleaner is handy for scrubbing sinks, toilets, showers, stove tops et cetera. 
First before I tell you how its made, a word on essential oils:
1. It may seem like essential oils are expensive. They can be a little spendy, but they go a LONG way. One 1/2 ounce bottle (which is what I have) contains about 600 drops. In the long run, using essential oils is actually very cheap and useful.
2. Not only are essential oils used for aromatherapy, but they are used as great cleaning agents. Yes, they do make our homemade cleaners smell wonderful, but they also help remove bacteria, mold, unpleasant odors, dust mites, and kill viruses.
3. I bought all of my oils from Whole Foods because they happened to be on sale for about 50% off, however this is not always the case. They can also be found quite reasonably on EBAY and many sellers will happily combine shipping if you are buying several varieties.


Here’s what you need:
1 box (16oz) baking soda
10 drops of Eucalyptus Essential Oil
10 drops of Lemon EO
10 drops of Cinnamon EO
5 drops of Clove Leaf EO
1. Pour baking soda into a small mixing bowl then add the drops of oils. Blend thoroughly with a fork.

2. I wanted my cleaner in a shaker, so I poured my cleaner into a jar and used a hammer and nail to punch several holes in the lid for the jar. Then voila, clean away!


Tuesday, December 14, 2010

Peppermint Bark


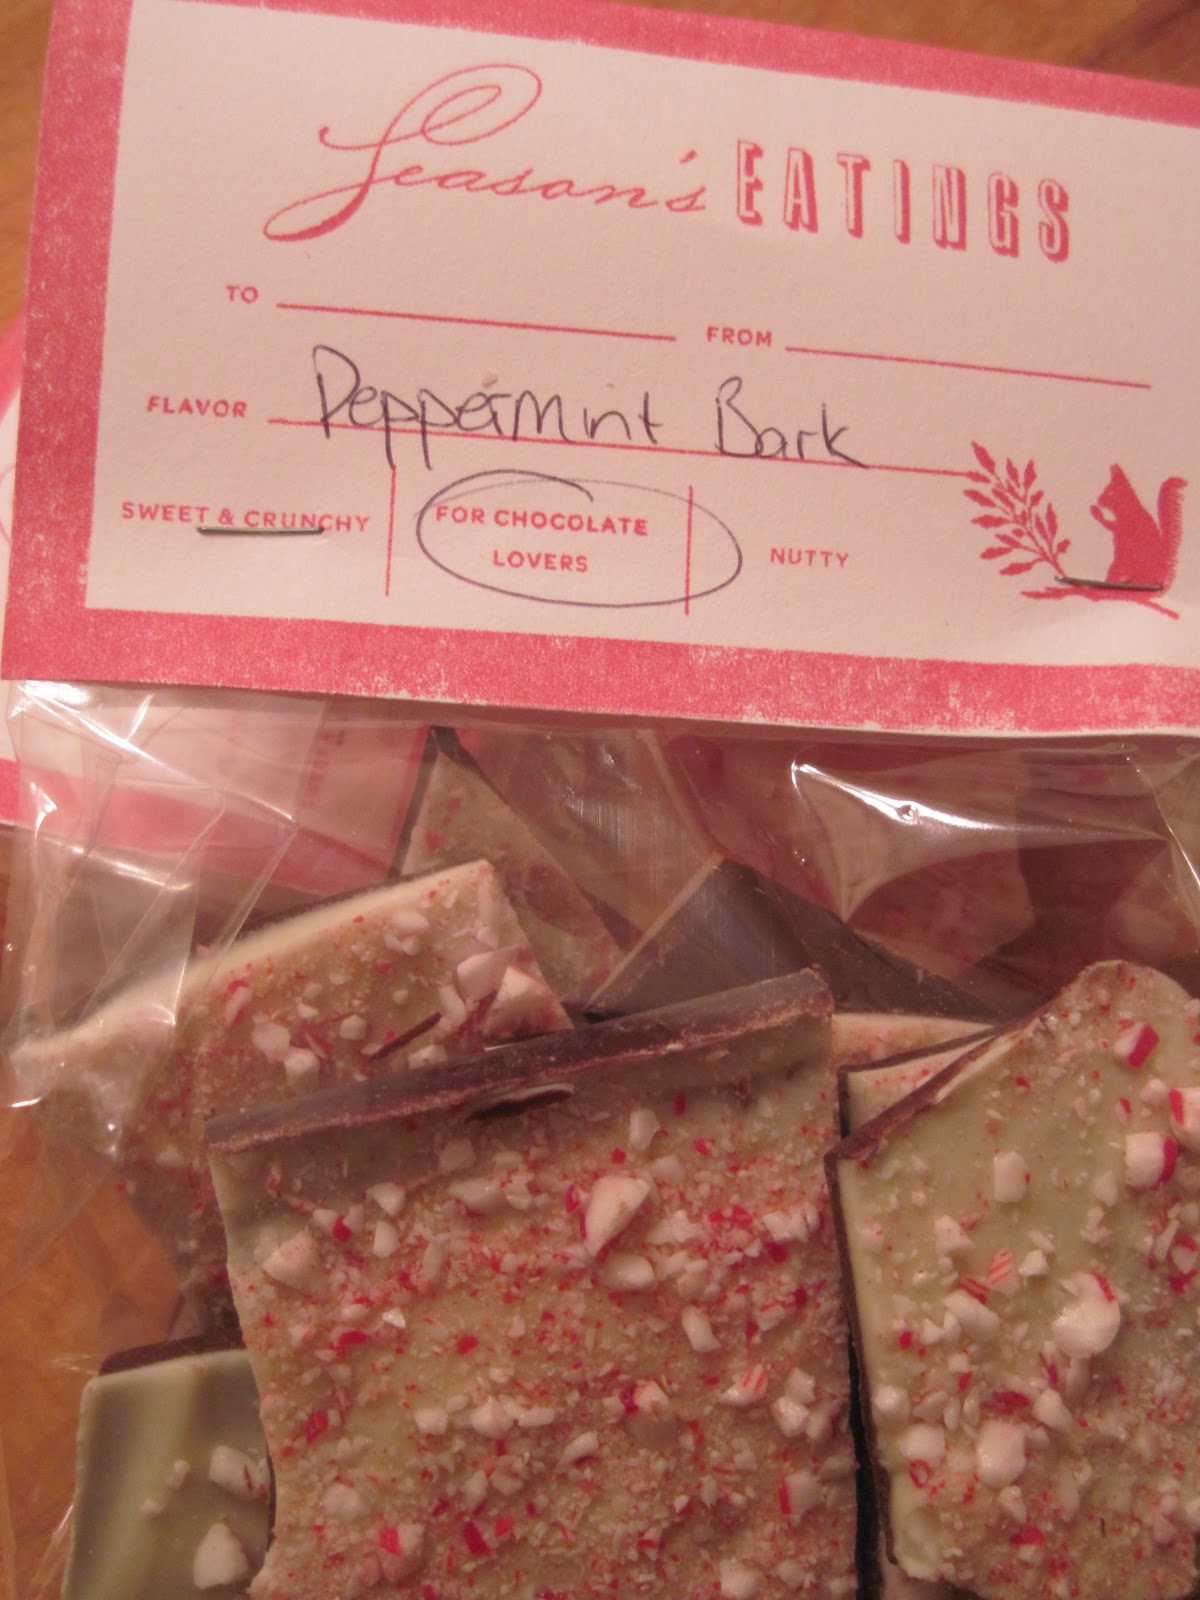
The holidays are officially upon us and it is time to think about making treats for our neighbors and teachers. I usually spend the day making several varieties of cookie but this year I decided that I should try my hand at the holiday favorite Peppermint Bark. This recipe was made popular by Williams and Sonoma and for how simple it is to make it is robbery how much they charge for it. This recipe is quite simple and provides a big payoff for how festive it looks. I package mine in some cello bags with a printable label from Martha Stewart you can download them here.

Ingredients:

2 c. semisweet chocolate chips
2 c. white chocolate chips
8 candy canes

1. Unwrap candy canes and break up into the bowl of a food processor, pulse several times to grind up the candy leaving some larger chunks. If you do not have a food processor then put the candy in a bag and beat with a rolling pen.
  
2. Place a heat proof bowl over a pan of simmering water over medium heat to make a double boiler. Melt your chocolate. This can also be done in a microwave safe bowl in the microwave. Once the chocolate begins to melt make sure that you stir it about every 30 seconds so you do not scald your chocolate.
3. Pour the melted chocolate into a foil lines baking sheet then firmly tap the baking sheet on the counter several times to ensure that you get an even layer of chocolate. Refrigerate until the chocolate hardens (approx. 5 to 10 min).
4. Melt the white chocolate in the same manner that you melted the dark, then pour on top of the hardened dark chocolate. Again, tap the baking sheet firmly on the counter to achieve even coating.

5. While the white chocolate is still liquid sprinkle on the ground candy canes then press down on it slightly to ensure it sticks.
6. Refrigerate your candy for at least 30 min to make sure it is set then break apart into irregular shapes.


Thursday, December 9, 2010

The Best Soup I Ever Had


I love eating in-season produce, however, this can present a bit of a problem during the winter. Veggies such as kale, chard, and collard greens are abundant this time of year and are rich in iron and folic acid, but I have always been somewhat perplexed on how to prepare them. I recently mentioned this dilemma to a friend of mine and she said that the answer to my problem lay in Olive Gardens Zuppa Toscana. Don't let the fancy Italian moniker faze you, translated it simply means Tuscan soup. Eating out at the Olive Garden is not really feasible when you have four kids but Olive Garden publishes many of their recipes on their website. I highly suggest you take some time a peruse some of your favorite dishes there and you will be surprised how simple they are to make. Olive Garden Recipes   This soup is rich, hearty and satisfying, in other words the perfect winter soup. It is quite literally the best soup I have ever had. The recipe below is copied from the Olive garden site, however, I did make a couple of changes. For instance, their recipe calls for  bouillon but I used "Better than Bouillon" which has all the convenience of bouillon cubes only without all the MSG. I also sauteed the kale with the sausage to give the kale a head start.


Zuppa Toscana


1 lb ground Italian sausage
1 1/2 tsp crushed red peppers
1 large diced white onion
4 Tbsp bacon pieces
3 cloves garlic
10 cups water
10 tsp "Better than Bouillon" (or fresh chicken broth)
1 cup heavy cream
3 large sliced russet potatoes
1/4 bunch of kale cut into pieces


  1. Sauté Italian sausage and crushed red pepper and kale in a large pot. Drain excess fat, refrigerate while you prepare other ingredients.
  2. In the same pan, sauté bacon, onions and garlic over low-medium heat for approximately 15 mins. or until the onions are soft.
  3. Add chicken bouillon and water to the pot and heat until it starts to boil.
  4. Add the sliced potatoes and cook until soft, about half an hour.
  5. Add the heavy cream and just cook until thoroughly heated.
  6. Stir in the sausage and the kale, let all heat through and serve. Delicious!


    Wednesday, December 8, 2010

    How to Make Vanilla Extract


    The holidays are upon us and for many of us that means plenty of baking. So why not replenish your supplies with some home made vanilla extract. Extract is exceedingly simple to make and with this method you will literally never run out of vanilla again. As you use your vanilla, simply top off the bottle with a little more vodka, and voila you have a perpetual store of vanilla. It can be made in any container that has a tight lid, however, we chose these bottles from IKEA for easy pouring (approx. $3). We also quadrupled the recipe to fill them. In addition to the benefit of never running out of vanilla the other benefit to making your own is the cost. High quality vanilla can be very expensive and this home made vanilla comes in at only a fraction of the cost. The color will darken over time and will be a rich brown in 2 months when it is ready to use. My vanilla pictured was just made and has not developed its full color yet.


    How to Make Vanilla Extract

    Commercial vanilla extract usually has simple syrup (sugar water) added to the extract to give it a sweet aftertaste. You can add this if you want to, however, if you are baking with it there is really no need.

    INGREDIENTS

    • 3 vanilla beans
    • 1 cup vodka
    • glass container with a tight lid (I prefer a bottle for easy pouring)

    METHOD


    1 Use kitchen scissors or a sharp paring knife to cut lengthwise down each vanilla bean, splitting them in half, leaving an inch at the end connected.
    2 Put vanilla beans in a glass jar or bottle with a tight fitting lid (mason jars work well). Cover completely with the vodka.
    3 Give the bottle a good shake every once in a while. Store in a dark, cool place for 2 months or longer.
    Lasts for years just remember to top off as you use it.
    You can also make vanilla sugar by putting a split vanilla bean into a jar of white, granulated sugar, great for your coffee in the morning or for baking.